
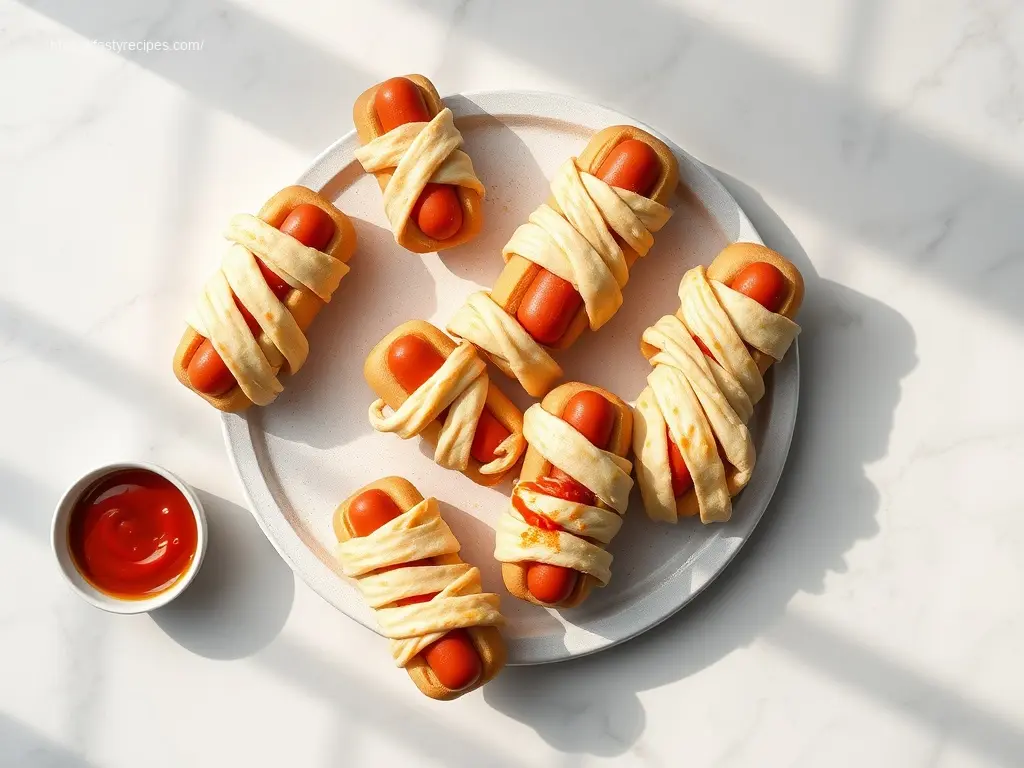
Unwrapping Spooky Fun with a Bite-Sized Treat!
Hey there, fellow foodies and Halloween enthusiasts! Remember those classic trick-or-treat nights filled with anticipation and sugary delights? There’s something undeniably magical about October, and for me, it’s not just about the costumes and candy – it’s about crafting delightful, spooky treats that bring smiles to faces of all ages. Today, we’re diving into a recipe that perfectly embodies that playful spirit: Mini Mummy Hot Dogs. They’re adorable, they’re delicious, and they’re guaranteed to be the star of your Halloween spread! Forget complicated concoctions; this recipe is about simple joy and maximum impact. Get ready to wrap up some fun!
Why Make This Recipe
Prepare to fall head over heels for these charming bites! Here’s why Mini Mummy Hot Dogs are about to become your new favorite Halloween tradition:
Adorably Spooky Appeal
Let’s be honest, they’re just cute! The way the pastry strips artfully wrap around the hot dogs, creating little peeking eyes, is irresistible. They’re perfect for captivating both kids and adults with their festive design.
Effortless Preparation
No culinary wizardry required here! This recipe uses readily available ingredients and a straightforward wrapping technique, making it perfect for even the most novice home cook. You’ll be amazed at how quickly these come together.
Crowd-Pleasing Flavor
Who doesn’t love a good hot dog? Encased in flaky, golden pastry, these savory treats are a surefire hit. They’re savory, satisfying, and universally loved.
Versatile for Any Occasion
While undeniably perfect for Halloween, these Mini Mummy Hot Dogs can also be adapted for other themed parties or even a fun weeknight dinner. Their grab-and-go nature makes them ideal party food.
How to Make Mini Mummy Hot Dogs
Making Mini Mummy Hot Dogs is easy and fun! You will unroll dough, cut it into strips, wrap the strips around hot dogs, bake them until golden, and then add little eyes.
Ingredients of Mini Mummy Hot Dogs
Gather your supplies. Here is what you need for your delicious Mini Mummy Hot Dogs:
Core Ingredients
- Pillsbury™ Crescent Rolls (or similar refrigerated dough): The “bandages” for our mummies.
- Small Hot Dogs (cocktail wieners or cut-down standard hot dogs): The delicious center of our treat.
- Mustard or Edible Candy Eyes: For those adorable, peeking eyes.
Optional Dipping Sauces
- Ketchup
- Mustard (honey mustard, spicy brown)
- BBQ Sauce
- Ranch Dressing
Directions of Mini Mummy Hot Dogs
Let’s get wrapping! Follow these simple steps to create your perfect Mini Mummy Hot Dogs:
Preparation
- Preheat Oven: Set your oven to the temperature specified on your crescent roll dough package (usually 375°F / 190°C).
- Prepare Baking Sheet: Line a baking sheet with parchment paper for easy cleanup.
- Unroll Dough: Carefully unroll your crescent roll dough on a clean surface. Do not separate into triangles yet.
- Cut Strips: Use a pizza cutter or sharp knife. Cut the dough horizontally into thin strips, about ¼ to ½ inch wide. You can get creative with uneven strips for a more “mummy” look.
Wrapping Your Mummies
- Wrap Hot Dogs: Take one hot dog. Wrap a strip of dough around it. Start at one end and spiral down to the other. Leave a small gap for the “face.”
- Tip: Do not wrap too tightly. The dough will expand. You want a bandaged look, not a smooth casing. Overlap the strips slightly for a more secure wrap.
- Tip: Leave a small gap open near one end. This is where the “eyes” will be.
- Repeat: Continue wrapping all your hot dogs until they look like adorable little mummies.
Baking to Golden Perfection
- Arrange on Baking Sheet: Place your wrapped Mini Mummy Hot Dogs on the prepared baking sheet. Leave a little space between each one.
- Bake: Bake for 12-15 minutes. Bake until the crescent rolls are golden brown and cooked through.
- Cool Slightly: Remove from the oven. Let them cool for a few minutes before adding the eyes.
Adding the Eyes
- Mustard Eyes: Use a toothpick or a small knife tip. Dab two small “eyes” of mustard into the gap you left on each mummy hot dog.
- Edible Candy Eyes: If using, carefully place edible candy eyes onto the gap. Use a tiny dab of mustard or cream cheese to help them stick.
How to Serve Mini Mummy Hot Dogs
Your Mini Mummy Hot Dogs are ready for their debut! Here are some ideas to make them even more festive and fun.
Spooktacular Serving Ideas
- Graveyard Dip Station: Arrange your mummy hot dogs around a bowl of dip. Turn the “graveyard” into a delicious centerpiece.
- Mummy Platter: Serve them on a platter with “bloody” ketchup drizzles for a fun, gruesome touch.
- Individual Treats: Arrange them in mini paper cups for easy grabbing at a party.
How to Store Mini Mummy Hot Dogs
You can store cooked and cooled Mini Mummy Hot Dogs in an airtight container in the refrigerator for 2-3 days. Reheat them gently in the oven or air fryer for best results.
Tips to Make Mini Mummy Hot Dogs
Tips for Success
- Do Not Overcrowd: Leave space between your Mini Mummy Hot Dogs on the baking sheet for even cooking and browning.
- Chill the Dough (Optional): If your kitchen is warm, chill the crescent roll dough for 10-15 minutes before unrolling. This can make it easier to cut into strips.
- Experiment with Wraps: Do not worry about perfection! Some uneven strips or slightly askew wraps add to the “mummy” charm.
Variation (if any)
Variations for Extra Fun
- Cheesy Mummies: Before wrapping, slice a small piece of cheese (cheddar or American). Tuck it around the hot dog for a melty surprise.
- Spicy Mummies: Add a dash of dry chili powder to the dough strips before wrapping. Or, serve with a spicy mayo dip.
- “Bloody” Mummies: Use red food coloring in a small amount of ranch or cream cheese. Create a “bloody” smear under the eyes or peeking out from the bandages.
FAQs
Can I make these Mini Mummy Hot Dogs ahead of time?
You can prepare the Mini Mummy Hot Dogs up to the point of baking. Store them covered in the refrigerator for a few hours. For best results, bake them fresh. The dough can get soggy if you leave it unbaked too long. Cooked leftovers can be reheated gently in an oven or air fryer.
What kind of hot dogs work best for Mini Mummy Hot Dogs?
Cocktail wieners (often labeled “little smokies” or “franks”) are the perfect size for individual Mini Mummy Hot Dogs. If you only have standard-sized hot dogs, simply cut them into thirds or quarters to achieve a similar mini size.
Can I use puff pastry instead of crescent rolls for these Mini Mummy Hot Dogs?
Yes, absolutely! Puff pastry will give your Mini Mummy Hot Dogs an even flakier, richer crust. Simply cut the thawed puff pastry into strips and wrap as directed. Baking times may vary slightly, so keep an eye on them until golden brown.
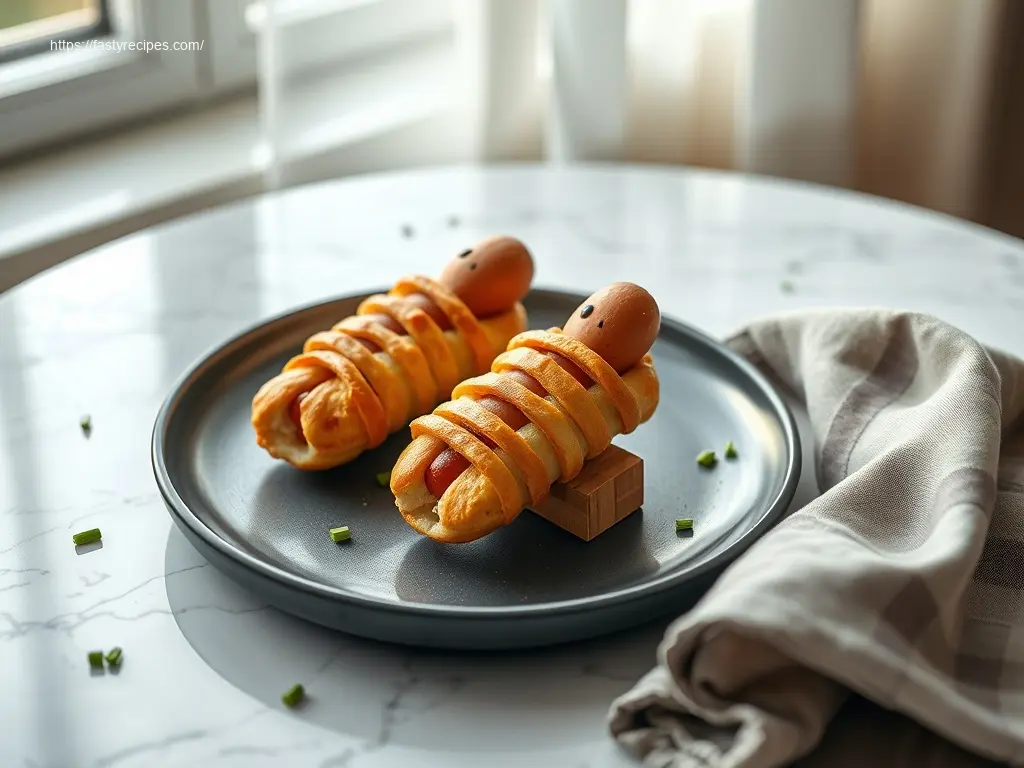
Simple Spooky Mini Mummy Dogs
Ingredients
Equipment
Method
- Preheat your oven to 375°F (190°C) and line a baking sheet with parchment paper.
- Unroll the crescent roll dough and cut it horizontally into thin strips, about ¼ to ½ inch wide.
- Wrap a strip of dough around each hot dog, spiraling down and leaving a small gap for the "face".
- Place the wrapped mini mummy hot dogs on the prepared baking sheet, ensuring some space between them.
- Bake for 12-15 minutes, or until the crescent rolls are golden brown and cooked through, then let cool slightly.
- For eyes, dab two small mustard dots or attach edible candy eyes using a tiny dab of mustard or cream cheese.
- Serve warm with your favorite dipping sauces.