Spooky Bites and Happy Memories
Welcome, fellow food lovers and Halloween enthusiasts! Remember those crisp autumn evenings, the scent of fallen leaves, and the thrill of dressing up for trick-or-treat? For me, Halloween has always been synonymous with warmth, laughter, and, of course, delicious treats. But what if we could add a touch of savory magic to our spooky celebrations this year, creating something truly fun and memorable for young ghouls and goblins (and even the grown-up ones)? Get ready to ditch the sugar rush for something equally delightful, ridiculously easy, and utterly adorable: our Halloween Mini Pizzas!
Why Make This Recipe
These aren’t just any mini pizzas; they’re little bites of Halloween joy! You’ll adore this recipe because it’s:
- Effortlessly Fun: Perfect for involving kids in the kitchen and sparking their creativity.
- Customizable: The possibilities for spooky shapes and toppings are endless.
- Crowd-Pleasing: A surefire hit at any Halloween party, potluck, or just a cozy family night.
- Quick & Easy: Spend less time cooking and more time enjoying the festivities.
- Savory Alternative: A welcome break from the usual sugary treats.
How to Make Halloween Mini Pizzas
Follow these simple steps to bring your Halloween Mini Pizzas to life!
Ingredients of Halloween Mini Pizzas
- For the “Crusts”:
- 1 (13.8 oz) can refrigerated pizza dough (the store-bought kind is perfect for quick fun!)
- Alternatively, use English muffins, pita bread, or even large crackers for different textures.
- For the “Blood” Sauce:
- 1/2 cup pizza sauce or marinara sauce
- For the “Mummy Wraps” & “Ghostly Shapes”:
- 1 cup shredded mozzarella cheese (pre-shredded is fine, or shred your own for extra meltiness)
- Optional: Sliced black olives for “eyes”
- Optional: Sliced green bell pepper or basil leaves for “witch’s hair” or “pumpkin stems”

Halloween Mini Pizzas
Spooky fun meets delicious food with these Classic Halloween Mini Pizzas! Perfect for a ghoulish gathering or a fun family dinner, these mini pizzas are easy to make and customize.
- Total Time: 25 minutes
- Yield: 12 mini pizzas 1x
Ingredients
12 English muffin halves or mini pizza crusts
1/2 cup pizza sauce
1 cup shredded mozzarella cheese
Pepperoni slices (for eyes and mouths)
Black olive halves (for pupils)
Green bell pepper, thinly sliced (for stems)
Instructions
1. Preheat oven to 375°F (190°C).
2. Arrange English muffin halves (or mini crusts) on a baking sheet.
3. Spread a thin layer of pizza sauce on each half.
4. Sprinkle generously with mozzarella cheese.
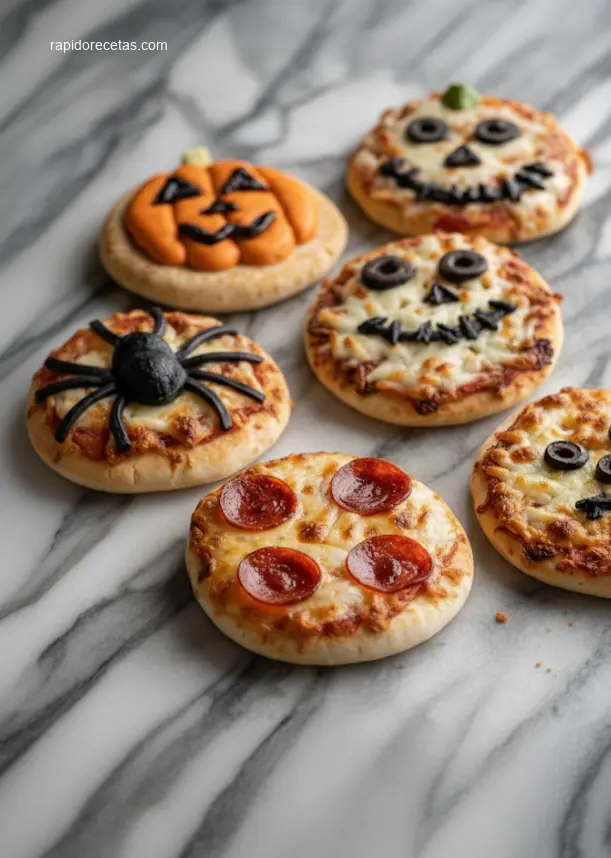
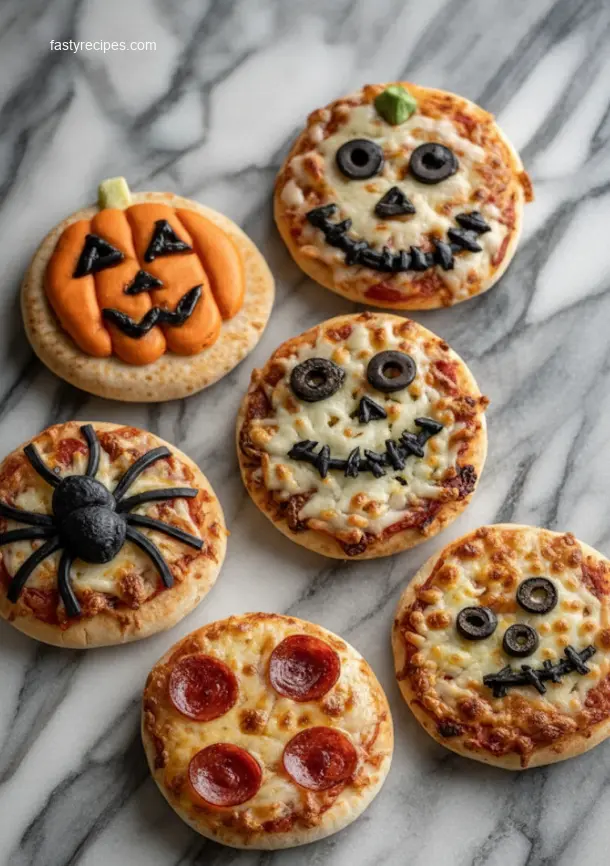
5. For mummy pizzas: Cut strips of mozzarella cheese and lay them across the pizza to resemble bandages, leaving a gap for the eyes. Add two black olive halves for eyes.
6. For jack-o’-lantern pizzas: Use pepperoni slices to create eyes, a nose, and a jagged mouth. Add a small slice of green bell pepper at the top for a stem.
7. Bake for 8-12 minutes, or until the cheese is melted and bubbly and the crusts are golden brown.
8. Serve immediately and enjoy your Halloween Mini Pizzas!
Notes
Get creative with your Halloween Mini Pizzas! You can use other toppings like mushrooms, bell peppers, or even make spider web designs with black olive slices. These are a fantastic way to celebrate the season with a fun, edible craft.
- Prep Time: 15 minutes
- Cook Time: 10 minutes
- Category: Appetizer
- Method: Baking
- Cuisine: American
Nutrition
- Serving Size: 2 mini pizzas
- Calories: 280
- Sugar: 3g
- Sodium: 650mg
- Fat: 12g
- Saturated Fat: 6g
- Unsaturated Fat: 5g
- Trans Fat: 0.1g
- Carbohydrates: 28g
- Fiber: 2g
- Protein: 12g
- Cholesterol: 30mg
Directions of Halloween Mini Pizzas
- Preheat & Prep: Preheat your oven to 400°F (200°C). Lightly grease a baking sheet or line it with parchment paper.
- Cut Your “Crusts”: Unroll the pizza dough. Use Halloween-themed cookie cutters (think ghosts, pumpkins, bats, or even simple circles) to cut out your mini pizza shapes. If using English muffins or pita, simply slice them in half.
- Sauce It Up: Spread a thin layer of pizza sauce over each dough cutout or English muffin half.
- Cheese It!: Sprinkle a generous amount of mozzarella cheese over the sauce. For “mummy” pizzas, you can strategically place strips of cheese to look like bandages.
- Decorate (The Fun Part!):
- Mummies: Add two black olive slices for eyes at the top of your cheese strips.
- Ghosts: If using ghost cookie cutters, you might just need olive eyes.
- Pumpkins: Use circular dough, cheese, and then a small piece of green bell pepper or basil for the stem. You can even cut small triangles out of a black olive for “eyes” and a small crescent for a “mouth.”
- Get creative!
- Bake to Perfection: Bake for 8-12 minutes, or until the crusts are golden brown and the cheese is bubbly and lightly browned. Keep a close eye on them, as mini pizzas cook quickly!
- Cool & Serve: Carefully remove from the oven and let cool for a few minutes before serving.
How to Serve Halloween Mini Pizzas
Your Halloween Mini Pizzas are versatile and can be enjoyed in many ways!
- Halloween Party Platter: Arrange them artfully on a platter with some spooky dips (like green guacamole or black bean dip).
- Lunchbox Surprise: Pack them cold in lunchboxes for a fun school treat.
- Movie Night Munchies: Perfect alongside a spooky movie marathon.
How to Store Halloween Mini Pizzas
You can freeze leftover Halloween Mini Pizzas! Once baked and completely cooled, arrange the Halloween Mini Pizzas in a single layer on a baking sheet and flash freeze them until solid. Then transfer them to a freezer-safe bag or container for up to 1-2 months. Reheat in the oven or air fryer until warmed through and bubbly.
Tips to Make Halloween Mini Pizzas
- Don’t Overload: Too many toppings can make your mini pizzas soggy. Less is often more!
- Cookie Cutter Tips: If dough sticks to the cookie cutter, dip the cutter in a little flour before each cut.
- Kid Involvement: This is the perfect recipe for little hands to help with spreading sauce, sprinkling cheese, and adding toppings.
- Prep Ahead: You can cut the dough shapes and even spread the sauce ahead of time, then store them covered in the fridge until you’re ready to bake.
- Cookie Cutter Care: Use metal cookie cutters for cleaner cuts, and ensure they’re sharp enough.
- Topping Placement: For “eyes” or other small details, place them after the initial cheese layer to ensure they don’t get lost.
Variations
- Veggie Monsters: Add finely diced bell peppers, mushrooms, or black olives to the cheese.
- Meaty Mummies: Add crumbled cooked ground beef or mini pepperoni slices under the cheese for extra flavor.
- Sweet & Spooky: Believe it or not, you could even make dessert mini pizzas with cream cheese, fruit, and a drizzle of chocolate for a different kind of treat!
- Gluten-Free Ghouls: Use gluten-free pizza crusts or gluten-free English muffins.

FAQs
Can I make these Halloween Mini Pizzas ahead of time?
Yes, you can prepare the base with sauce and uncooked toppings, then cover loosely and refrigerate for up to 24 hours. Bake just before serving for the best results. The cooked Halloween Mini Pizzas also store well and can be reheated gently.
What if I don’t have Halloween-themed cookie cutters for my Halloween Mini Pizzas?
No problem! You can simply use a round cookie cutter, the rim of a glass, or even a knife to cut square or rectangular shapes. You can still create spooky designs on top with cheese and olive cutouts.
Are these Halloween Mini Pizzas suitable for adult parties too?
Absolutely! While they’re kid-friendly, these Halloween Mini Pizzas are a hit with all ages. You can even elevate them with gourmet toppings like caramelized onions, goat cheese, or spicy pepperoni for an adult twist.

