Unleash Your Inner Spooktacular Baker!
Hey there, fellow dessert enthusiasts and Halloween lovers! Are you ready to add a dash of delightful spookiness to your autumn celebrations without sacrificing an ounce of deliciousness? Forget those store-bought treats that lack personality; today, we’re diving headfirst into a recipe that’s as fun to make as it is to eat. Get ready to transform ordinary brownies into extraordinary, ghoulishly good works of art that will have everyone screaming… for more!
Why Make This Recipe
These aren’t just any brownies; they’re a frightfully fantastic experience! Here’s why you’re about to fall head over heels for our Spooky Mummy Brownies:
They’re Kid-Friendly Fun Making these mummies is a fantastic activity for the whole family. Little hands can help with the “wrapping,” making it a memorable Halloween tradition.
Irresistibly Delicious Beneath that adorable mummy exterior lies a rich, fudgy, and decadent brownie that’s sure to satisfy any chocolate craving.
Perfect for Any Occasion Whether it’s a Halloween party, a cozy autumn evening, or just a fun baking day, these Spooky Mummy Brownies are always a hit.
Visually Stunning They’re showstoppers! Prepare for oohs and aahs when you present these charmingly creepy treats.
How to Make Spooky Mummy Brownies
Let’s get down to the delicious details! Here’s everything you need to create your own batch of Spooky Mummy Brownies.
Ingredients of Spooky Mummy Brownies
For the Fudgy Brownies
* Unsalted butter, melted * Granulated sugar * Large eggs * Vanilla extract * All-purpose flour * Unsweetened cocoa powder * Salt * Chocolate chips (optional, for extra richness)
For the Mummy Decoration
* White chocolate chips or candy melts * Shortening or coconut oil (optional, for smoother melting) * Edible googly eyes
Print
Spooky Mummy Brownies
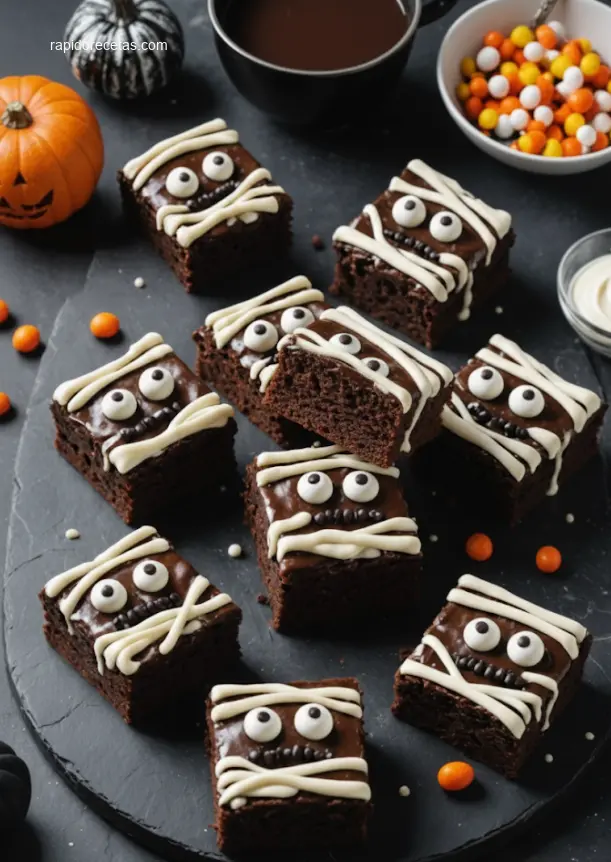
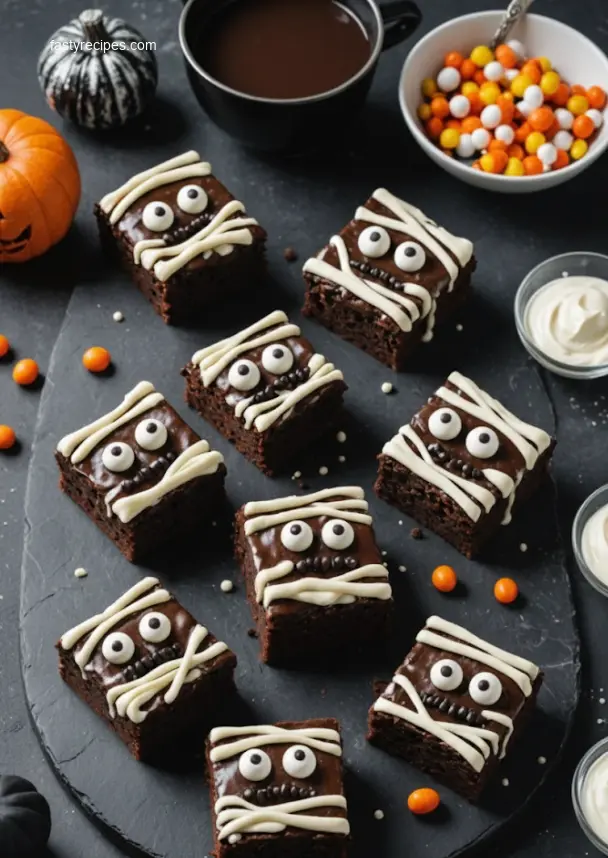
These Spooky Mummy Brownies are fudgy, chocolatey treats perfect for Halloween! Decorated with white chocolate ‘bandages’ and candy eyes, they’re sure to be a ghoulishly good hit.
- Total Time: 50 minutes
- Yield: 24 brownies 1x
Ingredients
1 cup (2 sticks) unsalted butter, melted
1 ¾ cups granulated sugar
4 large eggs
1 teaspoon vanilla extract
1 cup all-purpose flour
½ cup unsweetened cocoa powder
½ teaspoon baking powder
¼ teaspoon salt
1 cup semi-sweet chocolate chips
⅔ cup white chocolate chips, melted (for decorating)
Candy eyes (for decorating)
Instructions
1. Preheat your oven to 350°F (175°C). Grease and flour a 9×13 inch baking pan.
2. In a large bowl, whisk together the melted butter and granulated sugar until well combined.
3. Beat in the eggs one at a time, then stir in the vanilla extract.
4. In a separate medium bowl, whisk together the flour, cocoa powder, baking powder, and salt.
5. Gradually add the dry ingredients to the wet ingredients, mixing until just combined. Do not overmix.
6. Fold in the semi-sweet chocolate chips.
7. Pour the batter into the prepared baking pan and spread evenly.
8. Bake for 25-30 minutes, or until a toothpick inserted into the center comes out with moist crumbs attached. Do not overbake.
9. Let the brownies cool completely in the pan on a wire rack.
10. Once cooled, cut the brownies into individual rectangles or squares.
11. Melt the white chocolate chips in a microwave-safe bowl in 30-second intervals, stirring until smooth.
12. Transfer the melted white chocolate to a piping bag with a small round tip (or a Ziploc bag with a corner snipped off).
13. Pipe “bandages” across the cooled brownies in a zig-zag pattern, leaving a small space for the eyes.
14. Carefully place two candy eyes on each brownie to create the mummy effect.
15. Allow the white chocolate to set before serving.
Notes
For an extra spooky touch, you can add a drop of red food coloring to some of the white chocolate for “bloody” accents. The Mummy Brownies are best stored in an airtight container at room temperature.
- Prep Time: 20 minutes
- Cook Time: 30 minutes
- Category: Dessert
- Method: Baking
- Cuisine: American
- Diet: Vegetarian
Nutrition
- Serving Size: 1 brownie
- Calories: 260 kcal
- Sugar: 28g
- Sodium: 100mg
- Fat: 15g
- Saturated Fat: 9g
- Unsaturated Fat: 5g
- Trans Fat: 0.1g
- Carbohydrates: 30g
- Fiber: 2g
- Protein: 3g
- Cholesterol: 50mg
Directions of Spooky Mummy Brownies
Making the Brownie Base
1. **Preheat and Prep:** Preheat your oven to 350°F (175°C) and line a 9×13 inch baking pan with parchment paper, leaving an overhang on the sides for easy removal. 2. **Melt and Mix:** In a large bowl, whisk together the melted butter and granulated sugar until well combined. 3. **Eggs and Vanilla:** Beat in the eggs one at a time, then stir in the vanilla extract until fully incorporated. 4. **Dry Ingredients:** In a separate medium bowl, whisk together the all-purpose flour, unsweetened cocoa powder, and salt. 5. **Combine Wet and Dry:** Gradually add the dry ingredients to the wet ingredients, mixing until just combined. Be careful not to overmix. If using, fold in the chocolate chips. 6. **Bake:** Pour the batter into your prepared pan and spread evenly. Bake for 25-30 minutes, or until a toothpick inserted into the center comes out with moist crumbs attached. 7. **Cool Completely:** Allow the brownies to cool completely in the pan on a wire rack before cutting. This is crucial for clean cuts.
Creating Your Mummy Wraps
1. **Cut the Brownies:** Once cooled, lift the brownies out of the pan using the parchment paper overhang. Cut them into individual rectangular pieces (approximately 2×3 inches). 2. **Melt the White Chocolate:** In a microwave-safe bowl, melt the white chocolate chips or candy melts in 30-second intervals, stirring well after each, until smooth. If too thick, stir in a small amount of shortening or coconut oil. 3. **Pipe the “Bandages”:** Transfer the melted white chocolate to a piping bag with a small round tip, or simply snip a tiny corner off a Ziploc bag. 4. **Wrap Your Mummies:** Starting from one side of a brownie, pipe uneven lines of white chocolate across the top, leaving a small gap near the top for the eyes. Continue piping, crisscrossing the “bandages” to create a mummy-like effect. 5. **Add the Eyes:** While the chocolate is still wet, gently press two edible googly eyes into the “head” area of each mummy brownie. 6. **Set:** Let the Spooky Mummy Brownies set at room temperature or in the refrigerator for a few minutes until the white chocolate hardens.
How to Serve Spooky Mummy Brownies
Now that you’ve mastered the art of Spooky Mummy Brownies, let’s explore ways to enhance your ghoulish treats!
Serving Ideas
* **Party Platter:** Arrange these Spooky Mummy Brownies on a festive Halloween-themed platter alongside other treats. * **Milk & Cookies:** Serve with a cold glass of milk for the ultimate comforting dessert. * **Ice Cream Topper:** A warm Spooky Mummy Brownie with a scoop of vanilla ice cream is pure bliss.
How to Store Spooky Mummy Brownies
Store your Spooky Mummy Brownies in an airtight container at room temperature for up to 3-4 days. For longer storage, you can refrigerate them, but they are often best enjoyed at room temperature.
Tips to Make Spooky Mummy Brownies
Tips for Success
* **Don’t Overbake:** Overbaking will result in dry brownies. Keep an eye on them! * **Quality Chocolate:** Use good quality cocoa powder and chocolate chips for the best flavor. * **Parchment Paper is Your Friend:** It makes removing the brownies and cleaning up a breeze. * **Cool Completely:** Patience is key! Don’t try to cut or decorate warm brownies. * **Start Small:** When piping the white chocolate, start with a smaller hole. You can always make it bigger. * **Practice Makes Perfect:** Don’t stress if your first few mummies aren’t perfect; they’ll still taste amazing!
Variation
Spooky Mummy Brownies Variations
* **Peanut Butter Mummies:** Swirl in a tablespoon or two of peanut butter into the brownie batter. * **Minty Mummies:** Add a few drops of peppermint extract to the brownie batter for a refreshing twist. * **Dark Chocolate Mummies:** Use dark chocolate instead of white chocolate for the bandages, or even milk chocolate for a different aesthetic. * **Sprinkle Fun:** Before the white chocolate sets, sprinkle a few Halloween-themed sprinkles over the “bandages.”

FAQs
Q1: Can I make these Spooky Mummy Brownies ahead of time?
A1: Yes! You can bake the brownies up to 2-3 days in advance and store them in an airtight container. We recommend decorating the Spooky Mummy Brownies closer to when you plan to serve them for the freshest appearance.
Q2: My white chocolate is too thick for piping. What should I do?
A2: If your melted white chocolate is too thick, stir in a tiny amount (1/2 teaspoon at a time) of shortening or coconut oil until it reaches a smoother, more pipeable consistency. This helps prevent the white chocolate from seizing.
Q3: Can I freeze these Spooky Mummy Brownies?
A3: Yes, you can freeze the undecorated brownies. Wrap them tightly in plastic wrap and then in foil. They can be frozen for up to 2-3 months. Thaw completely before cutting and decorating your Spooky Mummy Brownies.

